Purpose: Use this guide to create a business checklist and link it to a business profile. Linking a checklist to a business profile allows you to save your checklist progress. NOTE: There are two possible scenarios described below when starting a Business Checklist. Be sure to follow the steps associated with your specific scenario.
Scenario 1: Creating a checklist without an active business profile.
Scenario 2: Creating a checklist and linking it to an active business profile. (Skip to Scenario 2.)
Scenario 1: Creating a checklist without an active business profile.
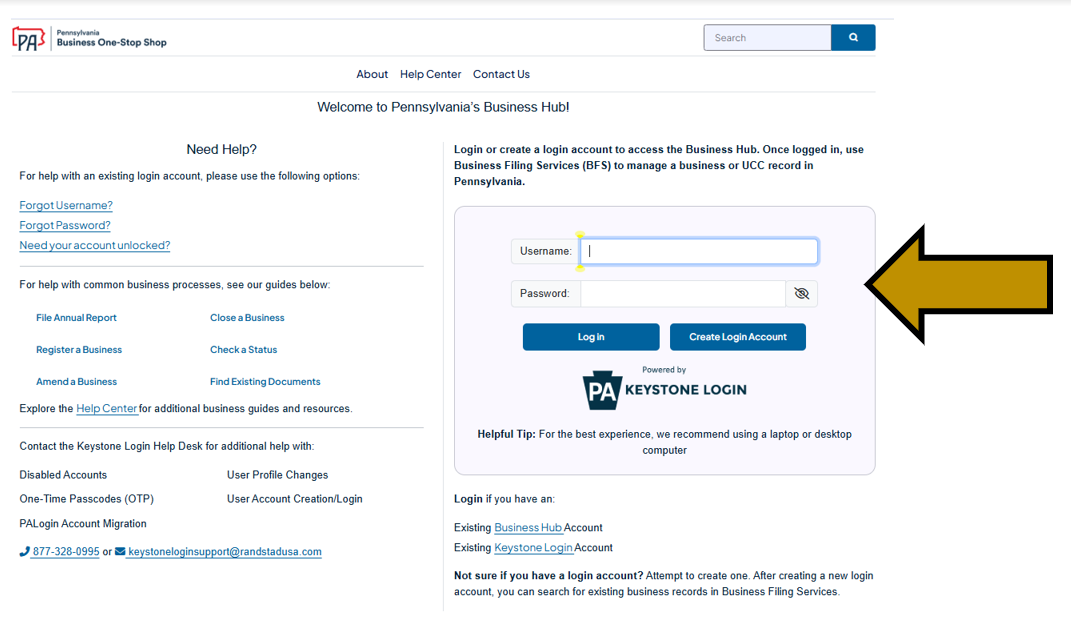
Step 1: Go to https://hub.business.pa.gov. Enter your username and password in the appropriate form fields. Click the Log In button. New users should click the Create Login Account button. For additional assistance with creating a new login account in the Hub, refer to the Create a Login Account in the Hub help guide. NOTE: The Business Hub uses Keystone Login to manage user login accounts. If you have an existing Keystone Login from any Commonwealth system associated with your email address, use your existing information to log in.
Step 2: Scroll down and under My Checklist(s) click the Start a Business Checklist link.

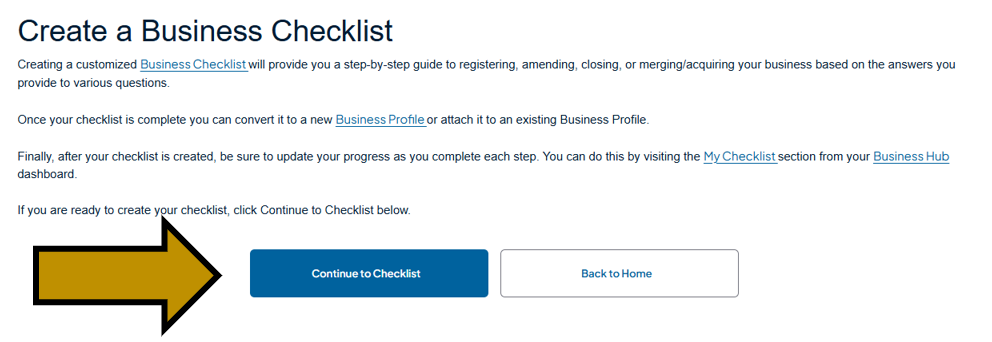
Step 3: Scroll down and click the Continue to Checklist button.
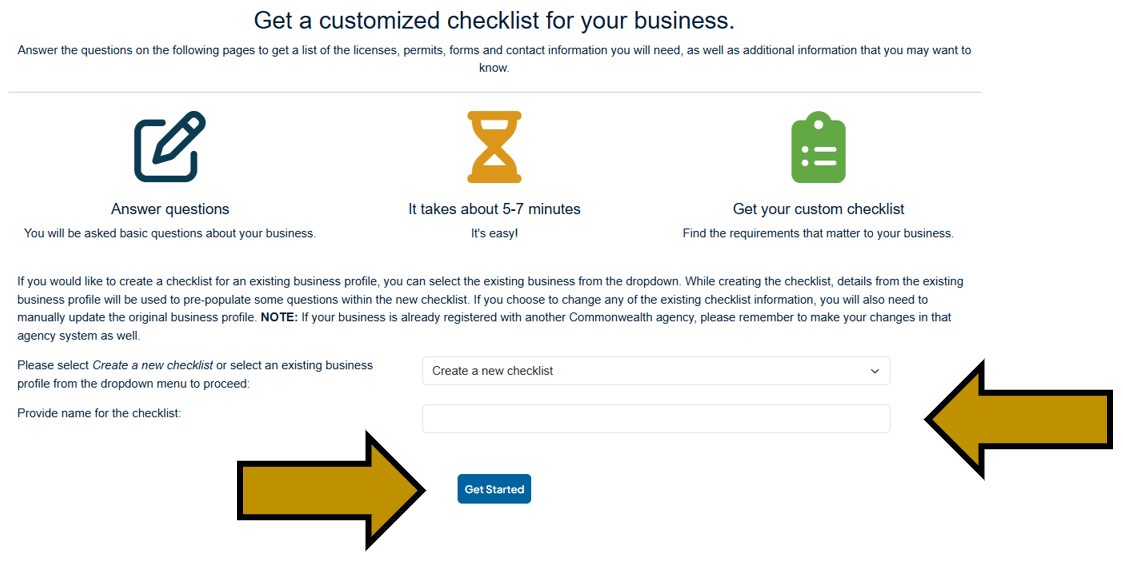
Step 4: The dropdown menu defaults to Create a new checklist. Enter a name for your checklist in the checklist name field. Then, click the Get Started button.
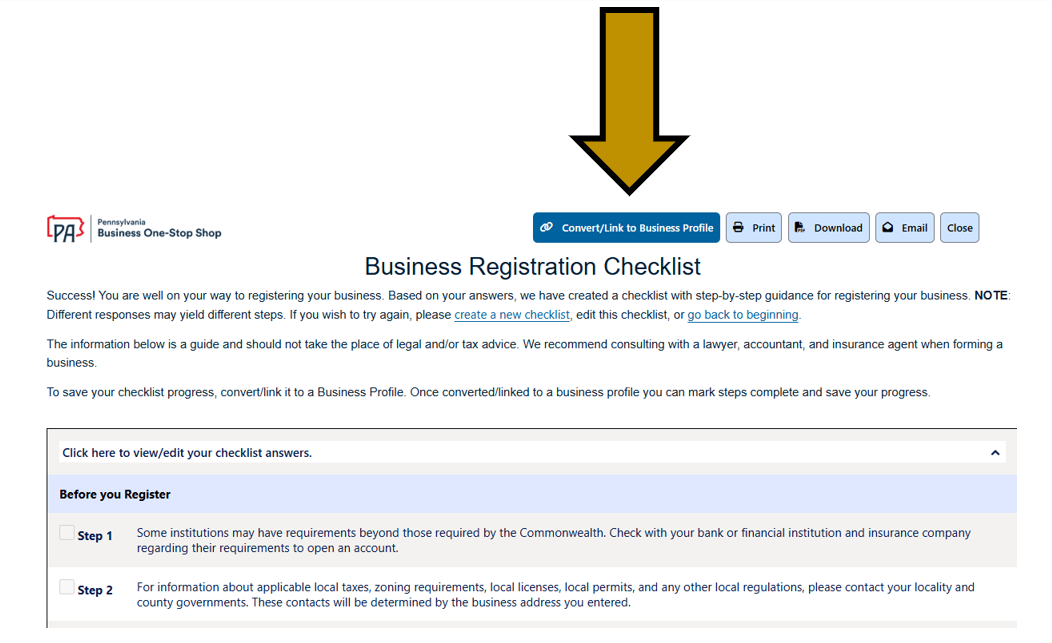
Step 5: Answer the questions to the best of your knowledge to generate a checklist. Review the checklist and, when you are ready, at the top click the Convert/Link to Business Profile button.
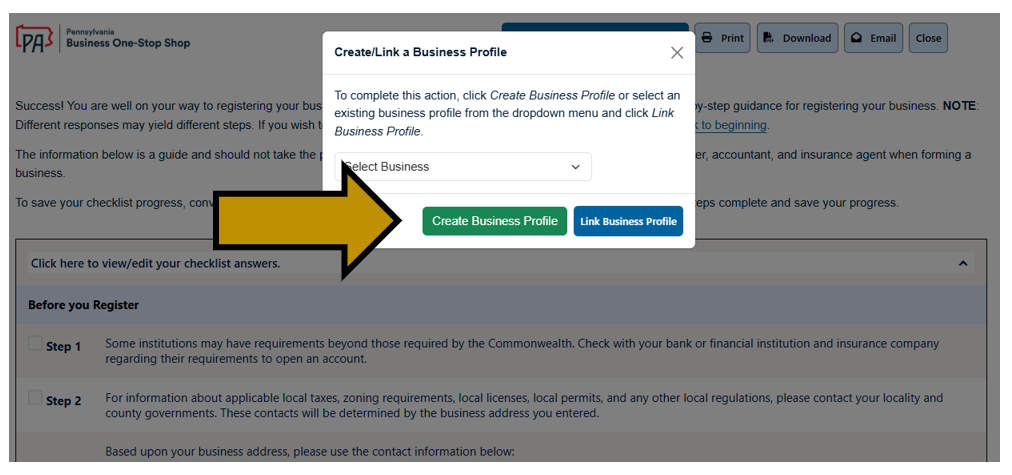
Step 6: Click the Create Business Profile button.
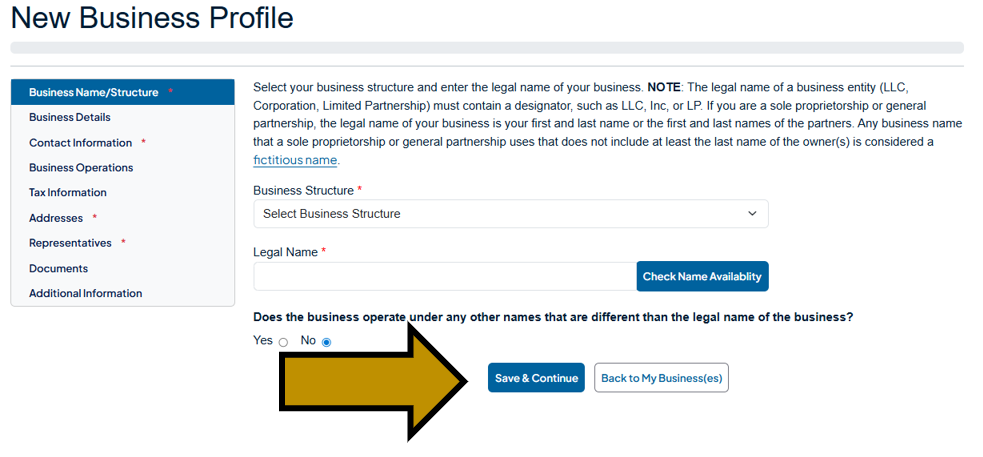
Step 7: Provide the required information on each page to create a business profile. Information you provided in the checklist will be pre-populated into the appropriate fields. Take the time to add all the information you have. Click the Save & Continue button to proceed through each screen.
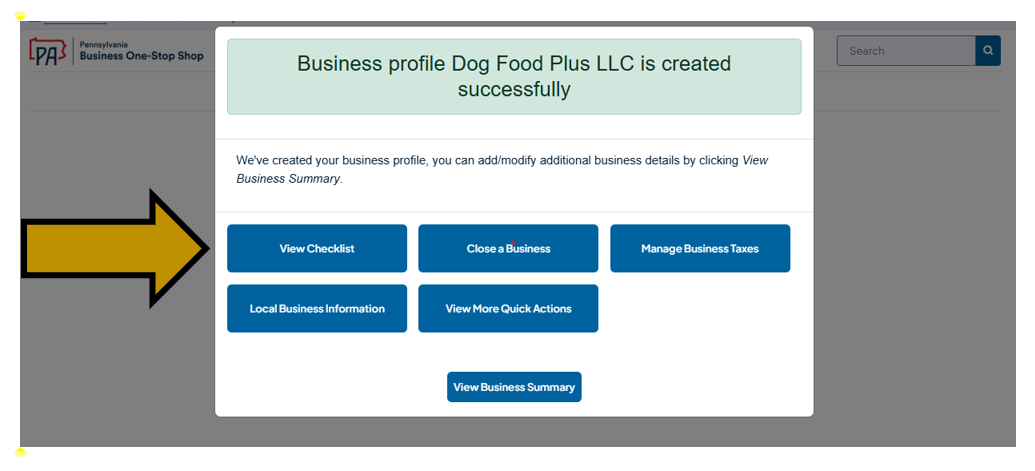
Step 8: After completing the business profile click the View Checklist button.
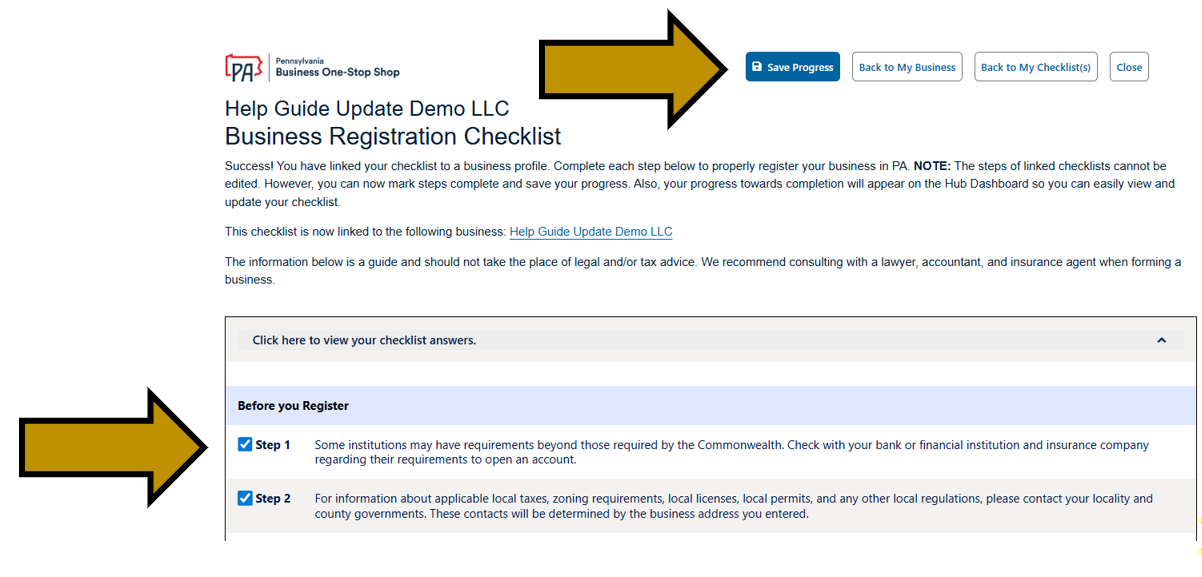
Step 9: Mark steps complete as you meet each requirement. To do so, check the box next to the completed step and click the Save Progress button. Exit the page using the Back to My Business, Back to My Checklist(s), or Close buttons.
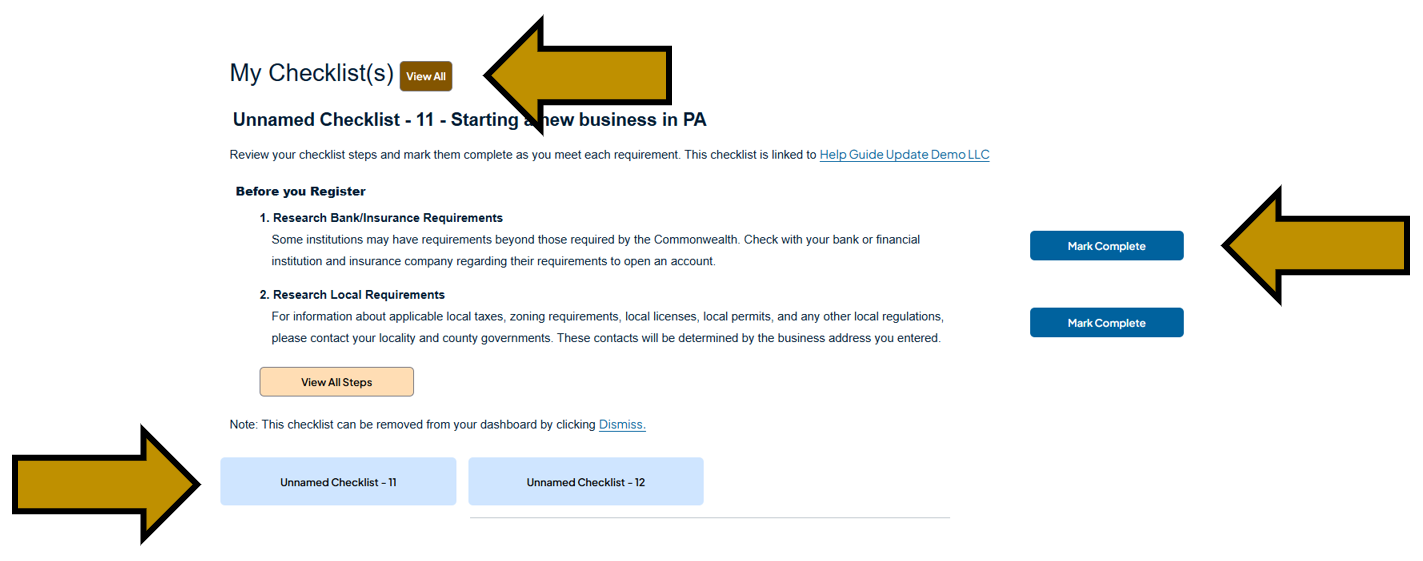
Step 10: Back on the Business Hub home page, you can view your recently created checklist. Click the View All button to see all the checklists you may have created. Use the Mark Complete button to quickly update your checklist as you meet each requirement. Quickly switch between mulitple checklists using the buttons at the bottom.
Scenario 2: Creating a checklist linked to an active business profile.
Step 1: Go to https://hub.business.pa.gov. Enter your username and password in the appropriate fields. Click the Log in button.
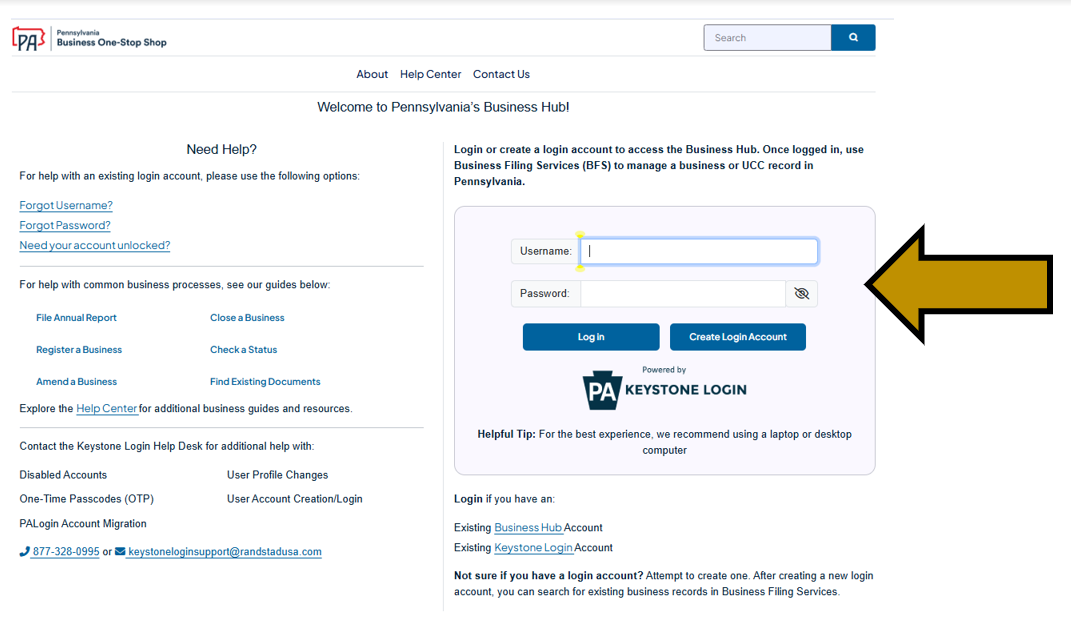
Step 2: Scroll down and under My Checklists click the Start a Business Checklist button.

Step 3: Click the dropdown arrow and select a business profile. Enter a name for your checklist in the checklist name field. Then, click the Get Started button.
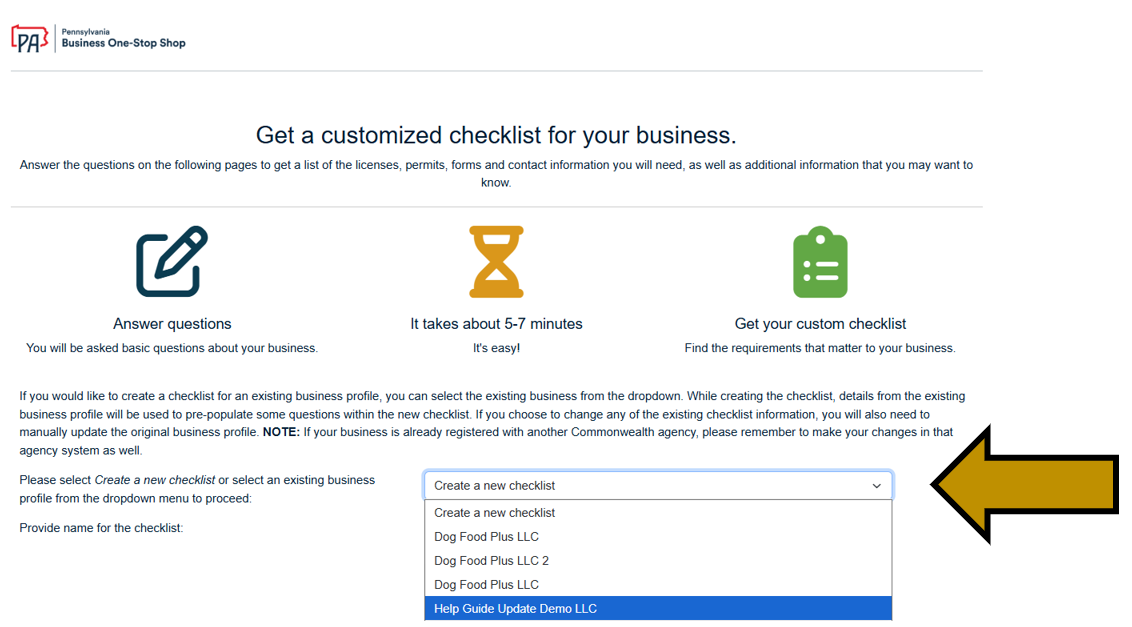
Step 4: Answer the questions to the best of your ability to generate a checklist. Information from the business profile will be pre-populated into the appropriate fields. After generating the checklist, mark steps complete as you meet each requirement. To do so, check the box next to the completed step and click the Save Progress button. Exit the page using the Back to My Business, Back to My Checklist(s), or Close buttons.

Step 5: Back on the Business Hub home page, you can view your recently created checklist. Click the View All button to see all the checklists you may have created. Use the Mark Complete button to quickly update your checklist as you meet each requirement. Quickly switch between mulitple checklists using the buttons at the bottom.

Revised 12/16/2025